|
OpenServer Release 6 Reviewers' Guide - Part 2
< Part 1 | Part 3 >
Getting Started
OpenServer Release 6 Installation Overview
The OpenServer 6 installation takes place in five phases:
- Initial boot and hardware detection
- Interactive Query Manager (IQM) collects configuration information from the user, including:
- Licensing, installation media device, and upgrade path information
- System level information
- Disk setup and software selections
- Final configuration information
- Hard disk initialization and preparation
- Filesystem creation
- Software installation
Only phases 1 and 2 require user interaction. The last two phases, where the system is actually installed, are usually the most lengthy: 10 to 20 minutes on new hardware; 1 to 1.5 hours on old hardware.
To Install OpenServer 6
Boot your computer using the OpenServer 6 CD.
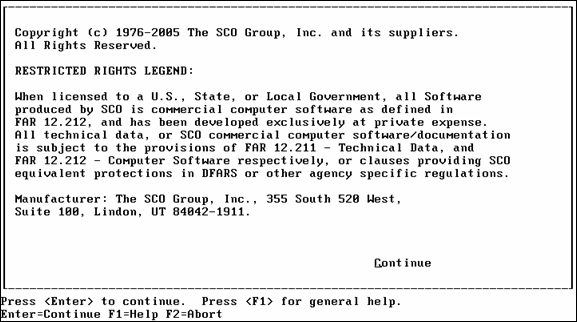
- The initial OpenServer 6 licensing screen will appear. Press Enter to continue.
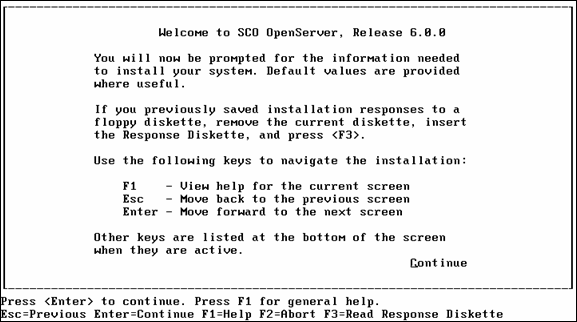
- The Welcome screen will then appear. Press Enter to continue.
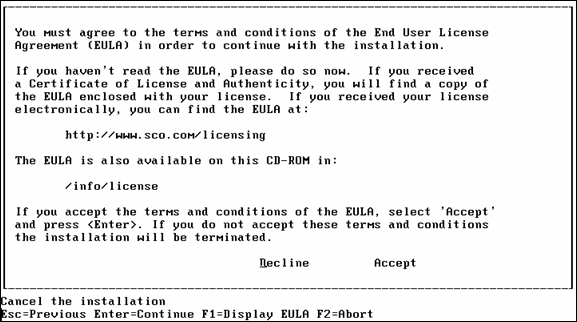
- An acceptance licensing screen will then appear. We invite you to read the license and then choose Accept to continue.
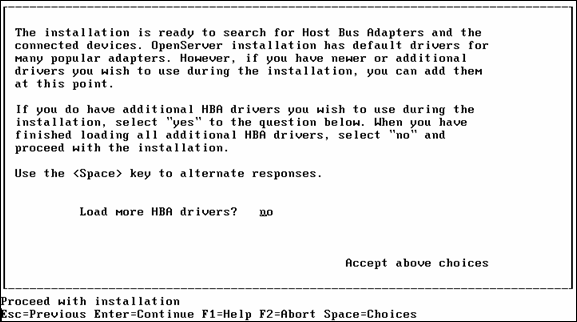
- The HBA (Host Bus Adapter) screen will then appear. If you do not have any HBA drivers to load, leave the default at “no” and choose Accept above choices to continue.
NOTE: The bottom of the screen outlines a number of navigation options.
- The system will now load the default HBAs from the CD media.
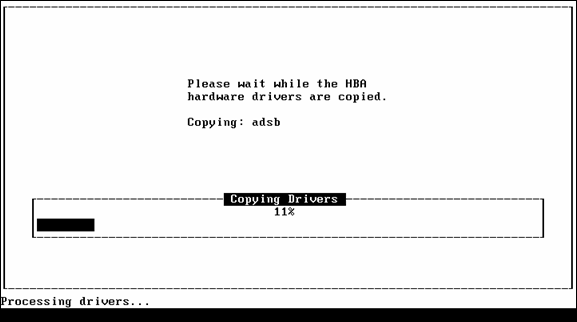
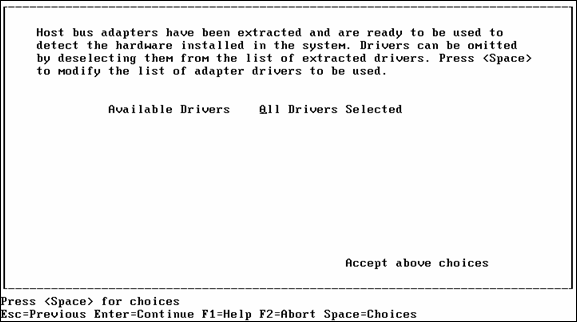
- In the following screen, leave the default of “All Drivers Selected”, and select Accept above choices to continue.
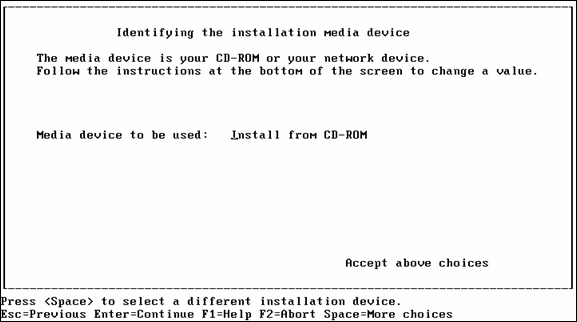
- In the following screen, leave the default choice of “Install from CD-ROM”, and select Accept above choices to continue.
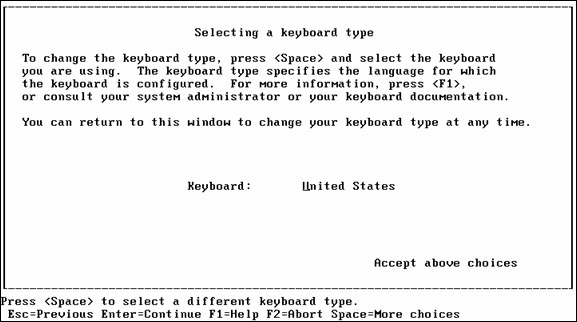
- In the Selecting Keyboard Type screen, select the appropriate keyboard option using the navigation options listed at the bottom of screen. Select Accept above choices to continue.
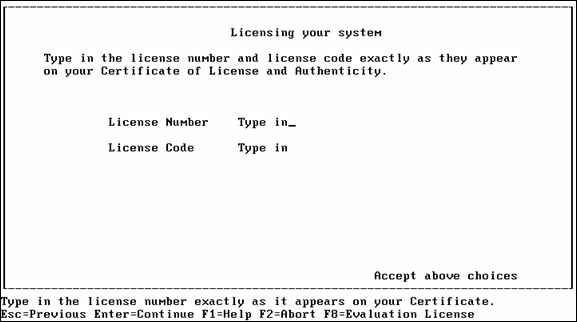
- In the Licensing Your System screen, enter in the following license information:
Press F8 to use the temporary evaluation license. .
Select Accept above choices to continue.
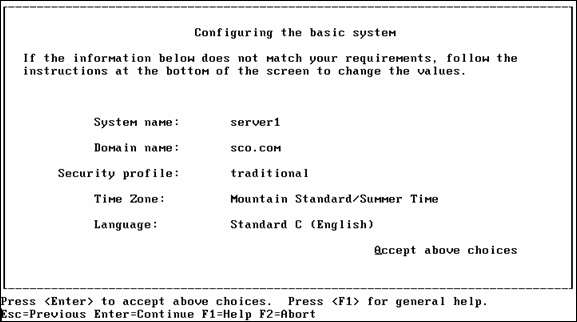
- In the Configuration screen, enter your server name, domain name, security profile, time zone, and language using the navigational options at the bottom of screen and select Accept above choices to continue.
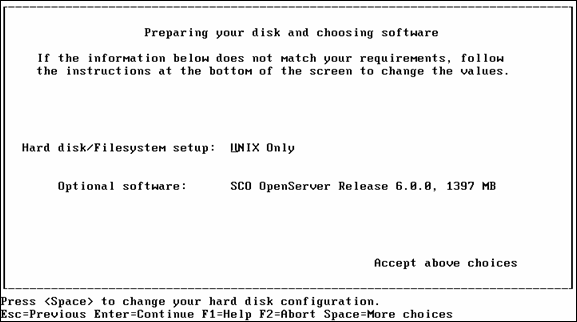
- In the Choosing Software screen, apply the defaults listed for this review. Select Accept above choices to continue.
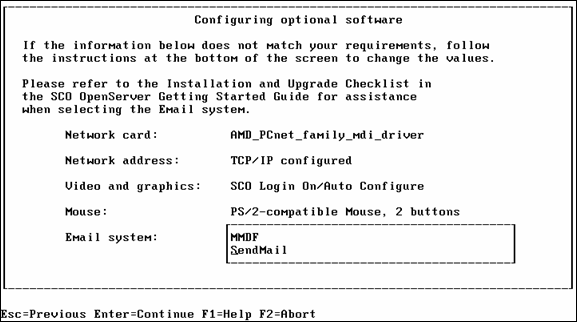
- In the Optional Software screen, press Enter to have the installation process autodetect your network card. Using the navigational options on the bottom of the screen, complete the process of configuring your network address, video, graphics and mouse.
Select Accept above choices to continue.
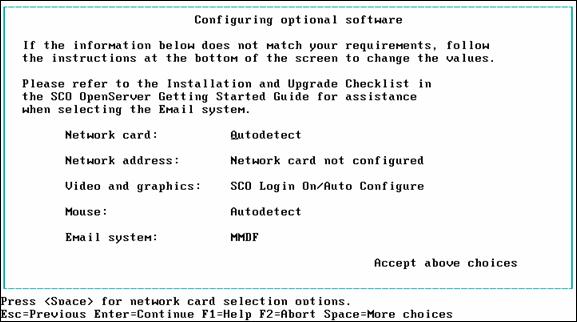
- If the Network address is not configured, select that option and open the Configuring your network screen. This step will allow you to configure your system based on your current Network address. Select Accept above choices to continue.
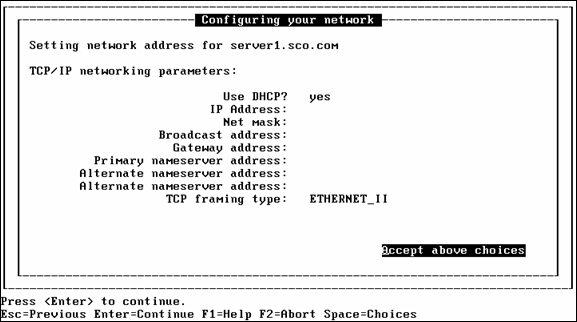
- Again, the Email System MUST be to SendMail for this review.
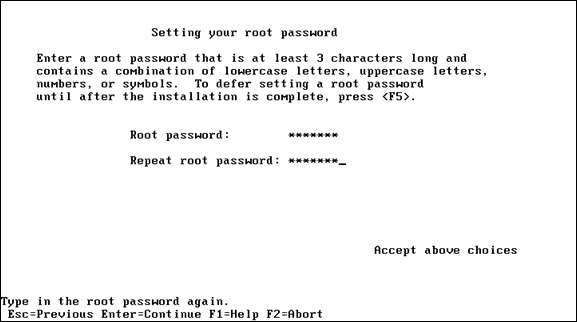
- In the Setting Root Password screen, enter a new password for the root (admin) account and confirm.
NOTE: Please make a note of the root password you choose to enter. This password will be required at a later point in the review. The “Repeat root password” field will appear after the initial “Root password” is entered.
Select Accept above choices to continue.
- In the following screen, please ensure that you are satisfied with your answers during setup. Then select Accept above choices to continue.
- The installation of the OpenServer 6 operating system will now begin.
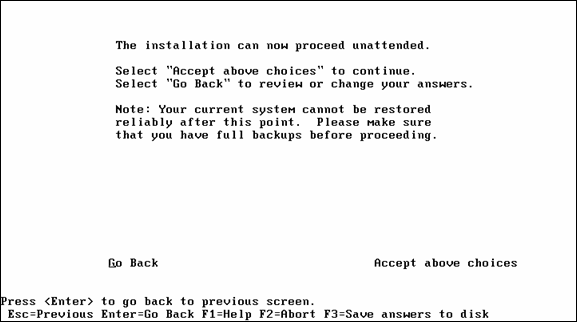
NOTE: Please make note that the entire installation process will likely take more than 60 minutes to complete.
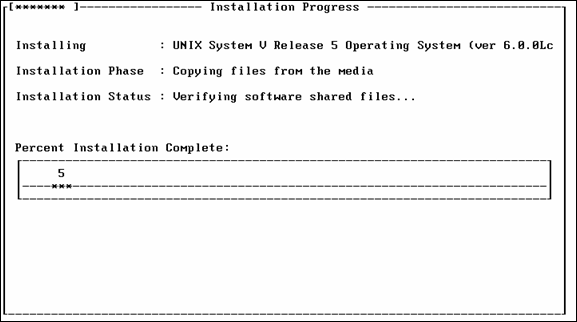
- The following screen provides additional detail on OpenServer 6 installation and configuration.
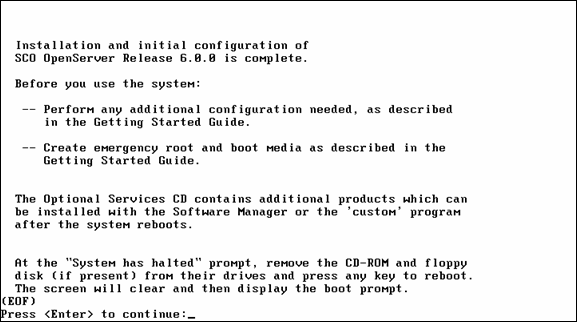
You have now completed the process of installing and configuring OpenServer 6.
To Open the OpenServer 6 Login Screen:
- Remove the OpenServer 6 CD from the CD-ROM drive and press Enter. The system will begin to load OpenServer 6.
- Press “any key” to continue when prompted by the system. The system will then run through some initial configuration screens and open the OpenServer 6 Login screen.
The review will now focus on some of the new features of OpenServer 6, including the new KDE desktop environment, Java Web application support, encrypted filesystem support and large file support (above 2 Gigabit).
OpenServer KDE
The KDE is a desktop environment that provides a modern computing interface, comparable to the look and feel of Microsoft Windows XP. The KDE contains a collection of programs, technologies and documentation that moves away from the classic mode of past OpenServer releases, called XDT3.
In this section, we will showcase the new KDE in OpenServer 6.
To Change from Classic OpenServer XDT3 to the New OpenServer KDE:
- At the OpenServer Login screen, log onto the system by entering root in the server login field.
- In the Password field, enter the root password that you assigned/created during the installation process.
NOTE: Password characters will not appear in the Password field for security reasons.
- Click Login. The classic OpenServer XDT3 desktop environment will appear.
- Double-click the Edit icon that is on the desktop. An editor window will appear.
- Select File à Open in the Edit window. The Open dialog box will appear.
- In this dialog box, double-click //etc in the Directories list. Then double-click /default in the Directories list.
- In the Files list, double-click X11. A new file will then appear in the Edit window.
- In the Edit window, change XDESKTOP=xdt3 to XDESKTOP=kde3.
- From the File menu, select Exit and then click Save in the message box provided.
To see the new KDE desktop environment in OpenServer 6, you must logout of the existing desktop environment and re-log into the OpenServer 6 system.
To Log Out of the OpenServer XDT3 Desktop Environment:
- From the File menu, select Exit.
- Click OK in the message box provided.
To Log into the OpenServer KDE Desktop Environment:
- At the OpenServer 6 Login screen, log onto the system by entering root in the server login field.
- In the Password field, enter the root password that you assigned/created during the installation process.
NOTE: Password characters will not appear in the Password field for security reasons.
- Click Login.
The initial launch of the OpenServer 6 KDE desktop environment will ask the user to assign specific preferences. For this review, we recommend simply using the Default options provided in the Desktop Settings Wizard. These preferences include:
- Country
- Language
- GUI Behavior (Windows, Mac, UNIX, etc.)
- KDE Performance Tuning
- GUI Themes
Once you’ve completed the KDE Desktop Settings Wizard walkthrough, the OpenServer 6 KDE desktop environment will now appear. It should be noted that the default screen resolution for the KDE desktop environment is set at the highest resolution supported by your system.
To Change the Screen Resolution:
- Click the K icon in the lower-left corner of the navigation bar, select System à Screen Resize & Rotate . A new Screen Resize & Rotate icon will appear in the lower-right corner of the navigation bar.
- Click on the Screen Resize & Rotate icon and select Configure Display. The Configure Display dialog box will appear.
- In this dialog box, check Apply settings on KDE startup and Allow tray application to change startup settings.Click OK.
- Click on the Screen Resize & Rotate icon again and select the preferred screen resolution. (We recommend selecting at least 1024 x 768 for this review.)
- In the Confirm Display Settings Change – Resize dialog box, click AcceptConfiguration to make the change. NOTE: If you do not accept the configuration selected in the time specified, you will need to repeat steps 4 and 5.
You have now completed the process of changing from an OpenServer XDT3 desktop environment to the new OpenServer 6 KDE desktop environment. You have also adjusted the screen resolution.
Java (Web Application) Support
OpenServer 6 now works with the latest web-enabling technologies, like Java. Xinuos understands the importance of these new web technologies, and now supports Java 1.4.2 development. Java 1.4.2 currently ships with a number of different demo applications included within the application. In this section, we will launch one of the demo applications shipped with Java 1.4.2.
To start up an existing Java application:
- Click the K icon in the lower-left corner of the navigation bar, select Run Command. The Run Command dialog box will appear. Enter the following command in the Command field provided:
- /opt/java2-1.4.2/bin/java –jar /usr/java/demo/jfc/Java2D/Java2Demo.jar
NOTE: It’s important to recognize that there are two spaces in this file path ( java –jar ) and multiple capitalizations used.
Click Run. The Java 2D Demo window will appear and display a running Java application.
- Click on the tabs provided in the Java 2D Demo window (Clippings, Colors, Fonts, Images, etc.). There are numerous examples of Java applications supported by OpenServer 6 running within this window.
- Once you’ve completed reviewing the Java applications provided, select Exit in the File menu.
You have now seen some of the Java support features in OpenServer 6.
Encrypted File Systems
OpenServer 6 provides users with the ability to encrypt/decrypt data used in AES 128-Bit file systems. Encrypted file system data protects the user or organization from unauthorized data usage.
For this review, we will outline the process of encrypting/decrypting files in OpenServer 6. It should be noted that the encryption/decryption process is transparent to the user. During this process, we will set up file encryption, set permissions, create a mount point, assign a variable, create the file system and mount the file system.
This process will showcase some of the safety and security features used to encrypt AES 128-Bit file systems in OpenServer 6.
To Setup an Encrypted File:
- In the KDE desktop environment, click on the UNIX icon. The UNIX terminal window will appear.
- In the terminal window, change to the root directory using the command cd /.
- At the root directory, enter “touch encrypted.file” (with quotation marks included) to create a file that will be eventually used as an encrypted file system.
NOTE: For this exercise, we will use the file name “encrypted.file”. However, any file name can be used.
- Press Enter. The encrypted.file will be automatically created.
- To verify that the encrypted file was created, type ls –l encrypted.file and press Enter. The encrypted.file will appear in the listing.
To Set the Appropriate Permission on the Encrypted File:
- In the terminal window, type chmod 660 encrypted.file to change the permissions for the newly created file.
NOTE: For this example, we will set the newly created file permissions to 660. This will grant read/write privileges to the owner and the group.
- Press Enter.
To Create a Mount Point Directory:
- In the terminal window, type mkdir /encrypt to make a directory that will act as a new mount point.
NOTE: This example will create a mount point off of the “root” directory.
- Press Enter. The new mount point directory (encrypt) will be automatically created.
- To verify that the new mount point directory was created, type ls –ld /encrypt and press Enter. The /encrypt directory will appear in the listing.
To Set the Appropriate Permission on the Mount Point Directory:
- In the terminal window, type chmod 750 /encrypt to change the permissions for the newly created mount point.
NOTE: For this example, we will set the newly created mount point directory permissions to 750. This will grant read/write/execute privileges to the owner and read/execute privileges to the group.
- Press Enter.
To Assign the Output of the Marry Command to a Variable
- In the terminal window, type
cryptfs=`marry –a –b 10005 –c “builtforsecurity” /encrypted.file`
Press Enter.
NOTE: In this example, the output of the “marry” command is assigned to the cryptfs environment variable; this is done only to simplify typing the commands in the next step.
To Create a File System within encrypted.file:
- In the terminal window, type
mkfs –F vxfs $cryptfs 10000
- Press Enter. A WARNING message will appear outlining specific instructions for file system creation.
- At the WARNING message, type “y” and press Enter. A Veritas filesystem will be automatically created in the encrypted file.
To Mount the Newly Created File System to the Mount Point:
In the terminal window, type
mount $cryptfs /encrypt
- Press Enter. The encrypted file system was automatically created. This encrypted file system was also mounted to the directory /encrypt. To view the newly created encrypted file system, change the directory (using the cd command) and verify that the encrypted file system has been successfully mounted by using the mount command. All data stored under /encrypt directory is now secured with 128 Bit encryption.
- From the File menu, select Exit to close the terminal window.
You have now successfully created an encrypted file system with OpenServer 6.
1 TeraByte File Support
OpenServer 6 now provides users with 1 TeraByte file support. A TeraByte is equal to approximately 1 trillion bytes. This new feature allows OpenServer 6 users to create files that are over the previous 2 gigabyte file limit in older versions of OpenServer. This new feature provides greater flexibility in file size and application usage.
To showcase this new feature, we will create a file that is larger than 2+ Gigabytes. In order to accomplish this task, we will need to use OpenServer 6 large filesystem-aware commands. These commands can be found in /u95/bin.
To Create a 2+ Gigabyte File:
In the KDE desktop environment, click on the UNIX icon. The UNIX terminal window will appear.
- In the terminal window, type
/u95/bin/dd if=/dev/urandom of=bigfile bs=100k count=40000
- Press Enter. A 4+ Gigabyte file will be created.
NOTE: This exercise will require approximately 5 minutes to complete. This test also requires approximately 5 Gigaytes of available disk space on your machine.
You have now successfully created a 2+ Gigabyte file in OpenServer 6. This completes the detailed instructions for the product walkthrough. Feel free to investigate other features within OpenServer 6.
Support
In OpenServer 6, Xinuos has revised the default configurations to provide more value along with new features contained in this latest release. The following table summarizes the OpenServer 6 Edition configurations.
Edition |
Starter |
Enterprise |
Users |
2 |
10 |
CPUs |
1 |
4 |
Memory |
1GB |
4GB |
New Optional Bundled Support
OpenServer 6 introduces optional support bundles providing customers with the convenience to purchase product bundled with basic break-fix support at reasonable cost. The service is designed to offer a streamlined low cost option with built-in flexibility. It allows for the ability to either add individual components to tailor customers’ business requirements, or, upgrade to one of the higher end options available from Xinuos’s award winning Support Services.
The support bundled with selected OpenServer 6 Editions includes the following services:
- Traditional “Break-Fix” support for six months
- Per Installation/server
- Four Business Hour Response
- Phone, E-mail, Fax or Web – Option to Uplift
- Two Authorized Technical Contacts
Customers wishing to add to the bundled services have the following options:
- 24 X 7 Emergency Service
- Retired Products
- One Business Hour Response Time
- Layered Product Add-on
- Upgrades to TEAM, SoftTech or SoftTech Plus
The following models are standard New, Upgrade and Trade-in Licenses for OpenServer 6 which include six months of support bundled in. Prices are introductory until 31 December 2005 after which price increases will take effect.
OpenServer 6 Editions With Bundled Support* |
License Pack |
Web License |
OpenServer 6 Enterprise Edition - 10-User, 4-CPUs, 4GB with Support |
LA262-UX00-6.0 |
LA262-UX00W-6.0 |
OpenServer 6 Starter Edition - 2 Users, 1CPU, 1GB with Support |
LA252-UX00-6.0 |
LA252-UX00W-6.0 |
* Standard Edition Licenses with 6 months of Xinuos Support bundled in.
Upgrades to OpenServer 6 From OpenServer 5.0.7 With Support |
License Pack |
Web License |
To OpenServer 6 Enterprise from OpenServer 5.0.7 Enterprise |
LX262-2600-6.0 |
LX262-2600W-6.0 |
To OpenServer 6 Starter from OpenServer 5.0.7 Host |
LX252-2400-6.0 |
LX252-2400W-6.0 |
To OpenServer 6 Starter from OpenServer 5.0.7 Desktop |
LX252-2200-6.0 |
LX252-2200W-6.0 |
To OpenServer 6 Enterprise from OpenServer 5.0.7 Host |
LX262-2400-6.0 |
LX262-2400W-6.0 |
* Standard Upgrades from OpenServer 5.0.7 with 6 months of Xinuos Support bundled in
Upgrades to OpenServer 6 From OpenServer 5.0.6 With Support |
License Pack |
Web License |
To OpenServer 6 Enterprise from OpenServer 5.0.6 Enterprise |
LX262-2601-6.0 |
LX262-2601W-6.0 |
To OpenServer 6 Starter from OpenServer 5.0.6 Host |
LX252-2401-6.0 |
LX252-2401W-6.0 |
To OpenServer 6 Starter from OpenServer 5.0.6 Desktop |
LX252-2201-6.0 |
LX252-2201W-6.0 |
To OpenServer 6 Enterprise from OpenServer 5.0.6 Host |
LX262-2401-6.0 |
LX262-2401W-6.0 |
* Standard Upgrades from OpenServer 5.0.6 with 6 months of Xinuos Support bundled in
Current/Previous Customer Trade-Ins With Support |
License Pack |
Web License |
OpenServer 6 Enterprise from OpenServer Enterprise 5.0.5 or earlier, OpenDesktop, Xenix plus support |
LX262-UX00-6.0 |
LX262-UX00W-6.0 |
OpenServer 6 Starter from OpenServer Host Release 5.0.5 or earlier, OpenDesktop, Xenix, plus support |
LX252-UX00-6.0 |
LX252-UX00W-6.0 |
OpenServer 6 Starter from OpenServer Desktop 5.0.5 or earlier, OpenDesktop, Xenix, plus support |
LX252-UX10-6.0 |
LX252-UX10W-6.0 |
* Standard Trade-ins with 6 months of Xinuos Support bundled in
Global Services and Support
Xinuos's award-winning Global Services offer a complete portfolio of world-wide services on Xinuos's full range of software products, allowing customers powerful choices based on business requirements.
Technical Support
Xinuos offers a wide array of technical support services ranging from business critical, 24x7 after-hours offerings to traditional support services covering all products and customer types from partners to end users. In addition, Xinuos support services are available to partners for their own use and resale.
Xinuos TEAM Support is designed for corporate customers requiring immediate, high-level, technical support. Included with TEAM is an assigned senior technical account manager to your company, responsible for assuring successful solution implementation and ongoing support for your Xinuos systems.
Xinuos SoftTech Plus includes support for unlimited licenses and installations covering all Xinuos products, with a guaranteed one-hour response time. This service is targeted to Xinuos partners and customers that need coverage for all Xinuos products. With SoftTech Plus, you also have an assigned administrative account manager as your primary contact for administrative issues.
Xinuos SoftTech includes support for unlimited licenses and installations with a guaranteed up to one-hour response time. SoftTech is available per operating system/product, allowing you the flexibility to add on additional products and services when you need them. Your administrative account manager provides a single point of contact for your administrative issues.
Professional Services
Xinuos's Professional Services offer a full suite of consulting services ranging from server deployment and management, migration and web services to customized solutions. For more information on Professional Services, visit http:/www.sco.com/consulting, or contact your local Xinuos sales representative.
For more information on Xinuos Global Services, call:
- In the Americas, phone 1-800-726-6561 or 1-831-427-6722
- Outside of the Americas, phone +353 1260 6333
Online Support Services
Xinuos also provides extensive 24x7 Self-Help technical support services on Xinuos products, including installation and configuration support through an easy-to-use, single Web view. The Self-Help Web site is located at: www.SCO.com/support/self_help.html .
More Information
For more information about OpenServer 6, please visit our Web site at www.sco.com/products/openserver6.
Press Contact
Blake Stowell
Public Relations Director
+1-801-932-5703
bstowell@sco.com
< Part 1 | Part 3 >
|
